
How Do I Flush Cannabis Plants?
In the vast world of cannabis cultivation, there are many moving parts to consider. In one of our previous blogs, we talked about the importance of proper pest management. Now, let’s dive into the world of flushing and explore its significance in achieving healthier plants and higher-quality yields. So, let’s get into it! Here’s everything you need to know about implementing a proper flush for your cannabis plants.
 What is a ‘flush’?
Firstly, flushing refers to the process of intentionally irrigating cannabis plants with pure water, free from any added nutrients or supplements. This practice is typically carried out towards the end of the plant’s growth cycle right before harvest.
The main purpose of flushing is to remove any accumulated mineral salts, nutrients, and other residual substances from the growing medium and plant tissues. By flushing, we allow the plant to consume its remaining nutrient reserve, leading to a cleaner, smoother, and more flavorful final product. Furthermore, the benefits of flushing go beyond just taste. It also enhances the overall quality of the buds by reducing the risk of nutrient imbalances or excessive nutrient buildup, resulting in a smoother smoking experience and increased potency.
Timing is key when it comes to initiating the flush. Generally, it’s recommended to start flushing around one to two weeks before harvest. This allows enough time for the plant to utilize the remaining nutrients and remove any excess substances while still maintaining its overall health.
However, it’s important to consider the specific strain, growing conditions, and nutrient regimen you’ve been following. Keep a close eye on your plants and be ready to adapt the flushing period based on their individual needs. Remember, every plant is unique, and your TLC will ensure the best results.
What do I need for a flush?
Next, now that we have a solid grasp on the importance of flushing, it’s time to dive into the crucial steps of preparation. Here is everything you need to know to get ready for a successful flush:
- Clean containers or buckets
Make sure you have clean containers or buckets of appropriate sizes to hold the water for flushing to prevent any contamination that could interfere with the effectiveness of the flush.
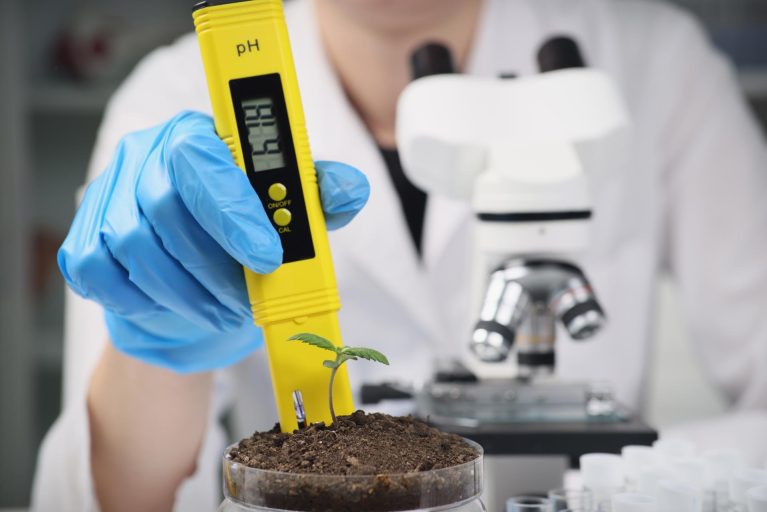
- pH testing kit
A reliable pH testing kit is crucial for monitoring and adjusting the pH levels of your water.
- High-quality water source
Use purified water that is free from chlorine, heavy metals, or other impurities. If your tap water isn’t suitable, consider using filtered or distilled water.
- Drainage trays
Invest in proper drainage trays or elevate your containers to allow excess water to flow out effectively.
How do I implement a flush?
So we’ve laid the groundwork for a successful flush, it’s time to roll up our sleeves and make this flush happen. Follow these 4 steps to implement your flush:
Step 1: Stop Nutrient Application
To kickstart the flushing process, stop applying nutrients to your plants. This allows them to utilize their remaining nutrient reserve before the flush begins. Typically, stopping nutrient application a few days before the flush is recommended.
Step 2: Flush with Water
Now comes the heart of the flushing process: using pure water to cleanse your plants. Here’s how to do it:
- Calculate the appropriate amount of water needed based on the size of your plants and growing containers. Aim to thoroughly saturate the growing medium without causing excessive runoff.
- You have a few options when it comes to flushing techniques. You can soak the soil from the bottom up, soak it from the top down, or saturate it all at once. Choose the method that works best for your setup and ensures proper saturation.
- After applying the flush water, it’s crucial to allow for proper drainage. Make sure your containers have adequate drainage holes and use trays to collect any excess runoff. Avoid leaving plants in standing water to prevent over-saturation and potential damage.
Step 3: Monitor the Runoff
To gauge the effectiveness of the flush, you can monitor the runoff. Here’s how to do it:
- Collect runoff samples: As the water drains from your containers, collect a sample of the runoff in a clean container or test tube.
- Evaluate pH & EC levels: Test the pH and EC of the runoff using a reliable testing kit. The pH should be within the desired range (around 6.0 to 6.8), and the EC levels should indicate a significant decrease compared to pre-flush readings. These indicators will confirm that your plants are effectively purging excess nutrients.
- Determine desired levels: Aim for a pH level and EC reading in the runoff that aligns with your target range. Different growers may have slightly different preferences, so it’s essential to understand your specific goals and adjust the flush duration accordingly.
Step 4: Adjust the Flush Duration
The duration of the flush may vary based on multiple factors, such as the strain, growing conditions, and previous nutrient regimen. Keep the following considerations in mind:
- Factors to consider: Evaluate the overall health and appearance of your plants during the flush. Factors like plant size, nutrient buildup, and desired flavor profiles can influence the flush duration.
- Monitoring plant health: Observe your plants closely during the flushing period. Pay attention to any signs of stress or deficiencies, such as yellowing leaves or stunted growth. Adjust the flush duration accordingly to ensure your plants remain healthy throughout the process.
- Signs of a completed flush: Look for visual cues, such as the fading of leaf color, and monitor the EC levels in the runoff. Once the EC levels indicate a significant decrease and your plants show signs of a clean nutrient slate, you can consider the flush complete.
What should I do after flushing?
Finally, after completing the flush, there are a few key steps to help your plants recover smoothly and regain their vigor. Make sure to do these three things after completing your flush:
- Dry out the growing medium gradually: This process helps restore the optimal balance of moisture in the root zone and encourages the plant to resume its natural nutrient uptake. Ensure proper airflow and monitor the moisture levels closely to avoid over-drying or waterlogging.
- Adjust your nutrient regimen: Start reintroducing nutrients gradually, considering the specific needs of your plants. Observe their response closely and make any necessary tweaks to achieve the desired balance. Remember, a gentle and gradual transition is key to preventing shock and ensuring a successful recovery.
- Observe the plant’s recovery: Keep a watchful eye on their overall health, growth patterns, and foliage color. Notice any positive changes or signs of rejuvenation. It’s normal for plants to experience a slight adjustment period, but with your attentive care, they will bounce back stronger than ever.
Premium Seed Market — Providing Affordable Cannabis Seeds for a Superior Cultivation Experience
Congrats! You’ve completed a successful flush. Now in a week or so, you’ll be able to harvest your plants and reap the benefits of implementing a proper flush. By preparing, executing, and recovering your flush, you will be able to improve the quality of your plants and have a superior cannabis experience.
Be sure to visit our online shop to peruse our vast array of affordable cannabis seeds.
Premium Seed Market is dedicated to empowering you with the knowledge and resources needed for successful cannabis cultivation. We hope this blog on flushing has been insightful and beneficial for your gardening journey. For more valuable information on cannabis cultivation, be sure to explore our FAQ page and stay tuned to our PSM Blog Page for ongoing hemp/cannabis education and helpful independent grower resources. If you have any questions or want to delve deeper into the world of cannabis cultivation, don’t hesitate to contact us. Happy growing!
*Remember to consult with a physician before making any changes to your health or fitness regimen.*